Blog
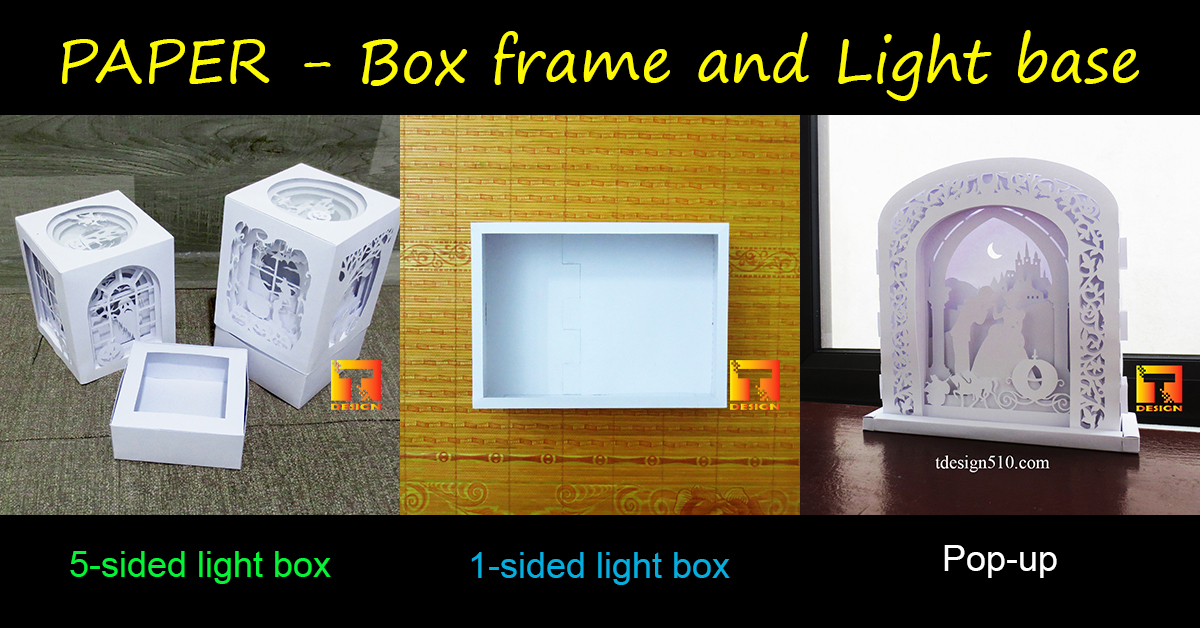
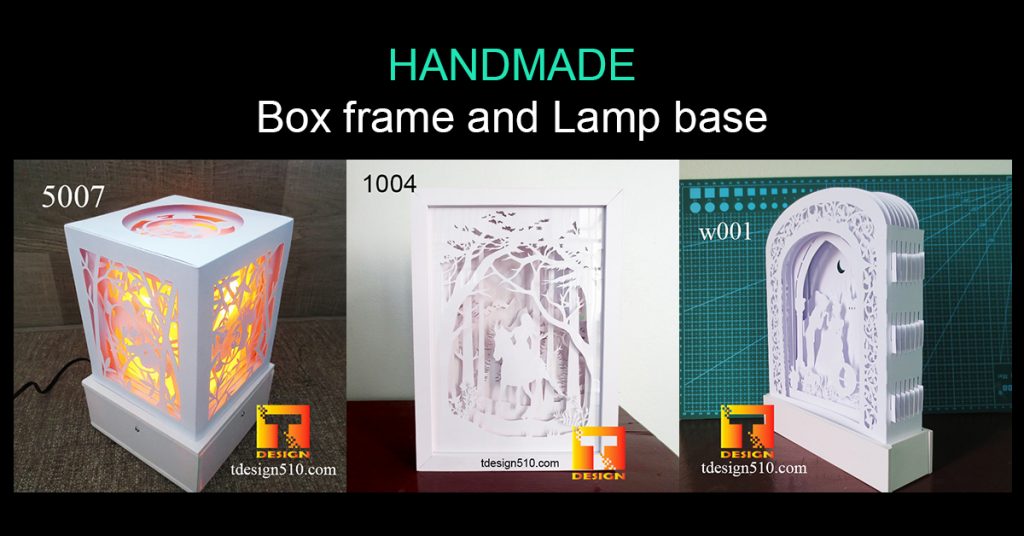
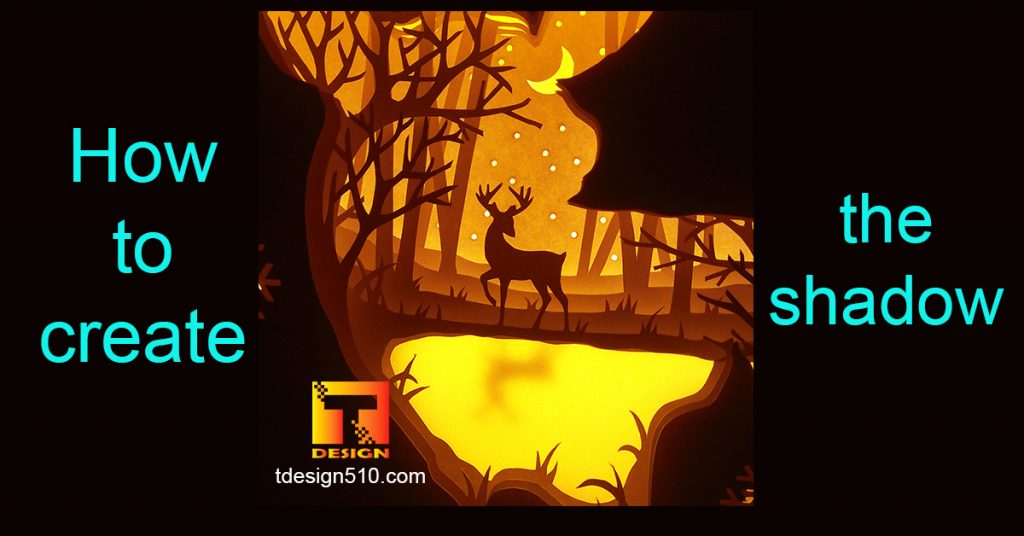
How To Make 1-sided Paper Cut Light Box
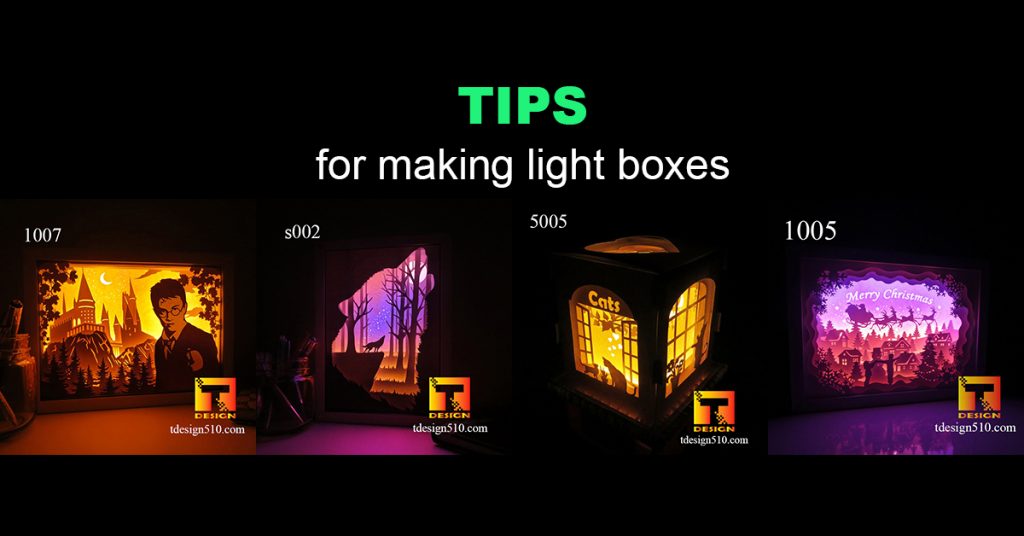
Only from 10 usd for super preferential combos (8 templates – 6 templates – 4 templates) with themes of Christmas, Halloween, Valentine’s Day, Mother’s Day, Father’s Day, International Women’s Day, and Harry Potter!!!
Click the link below to shop now!
https://tdesign510.com/product-category/combo/
Follow us more when like page https://www.facebook.com/tdesign510/
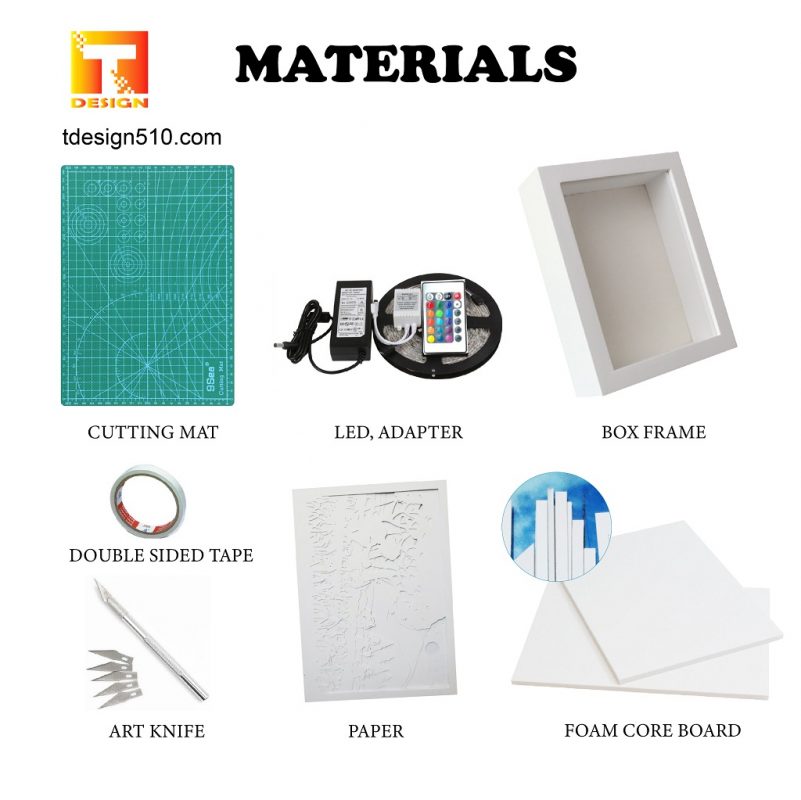
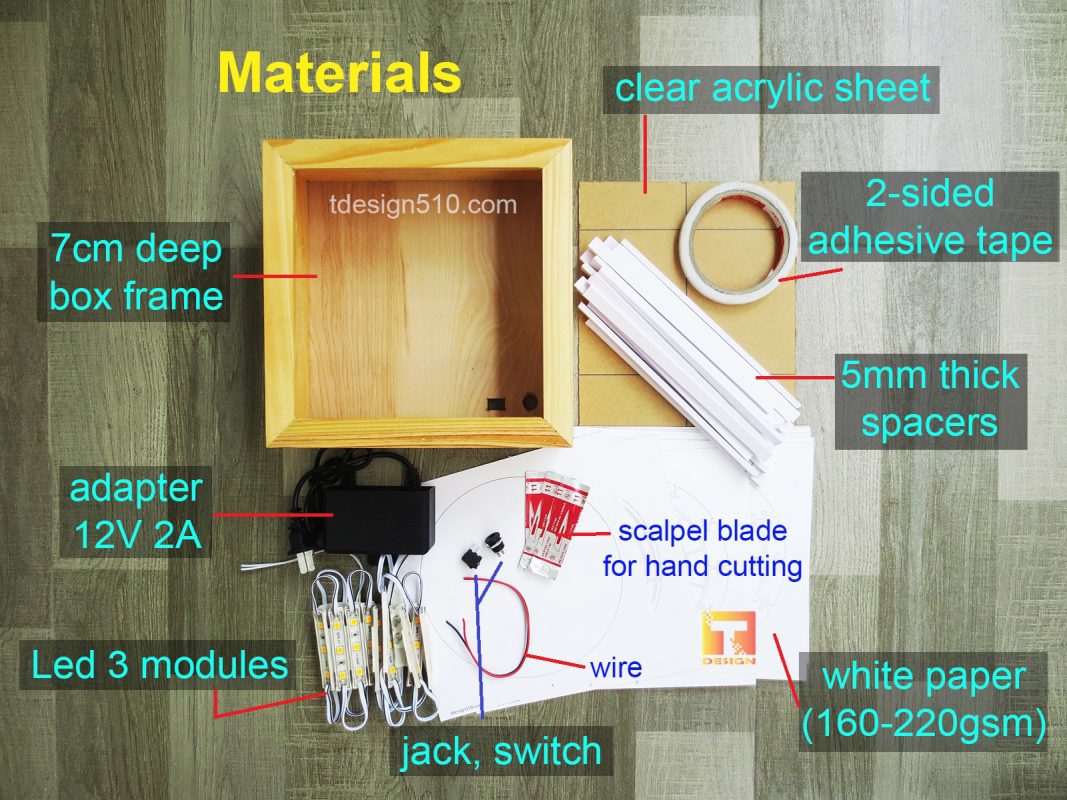
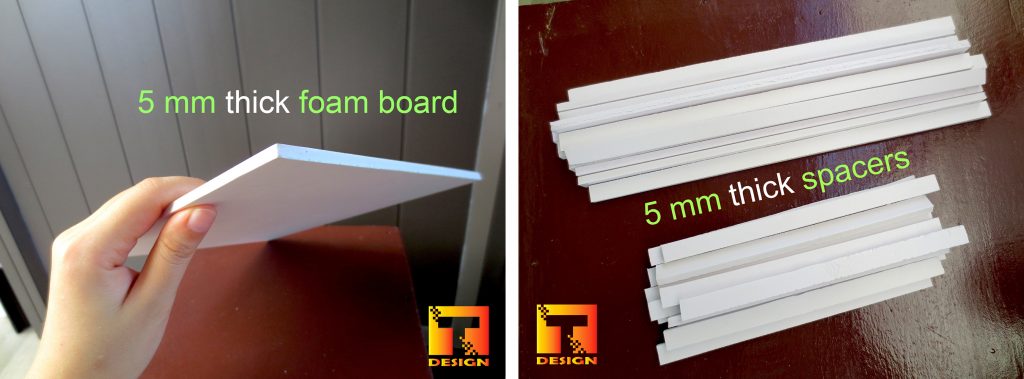
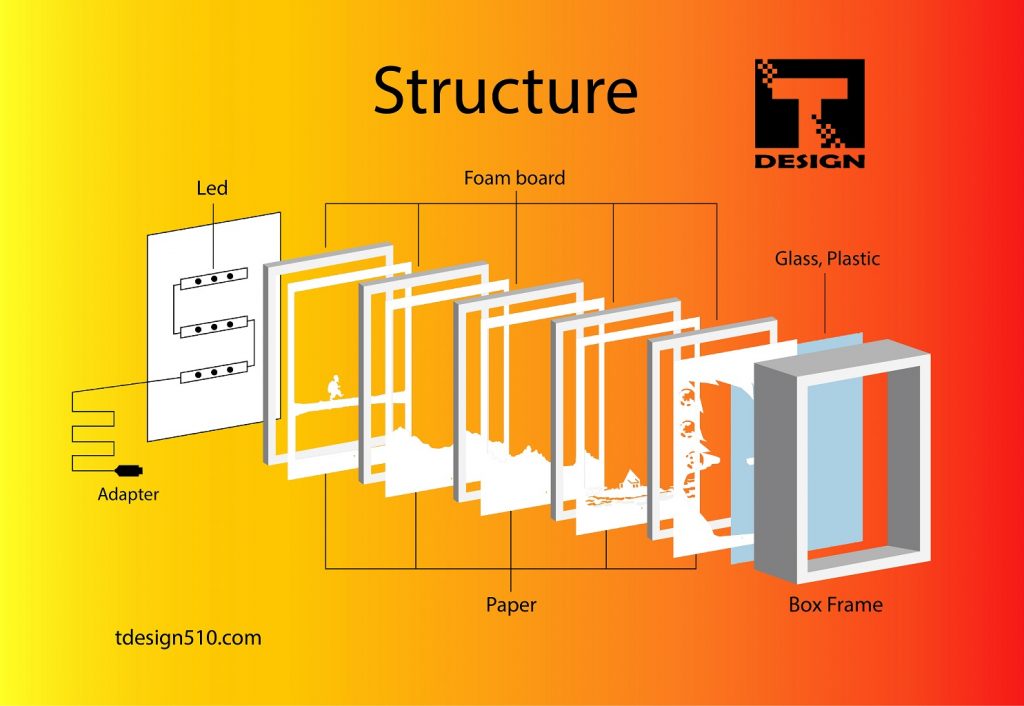
Materials: 160-250gsm paper, knife (or cutting machines), double-sided tape, 5mm thick foam board, led light.
Video:
—————–
Steps to make a light box
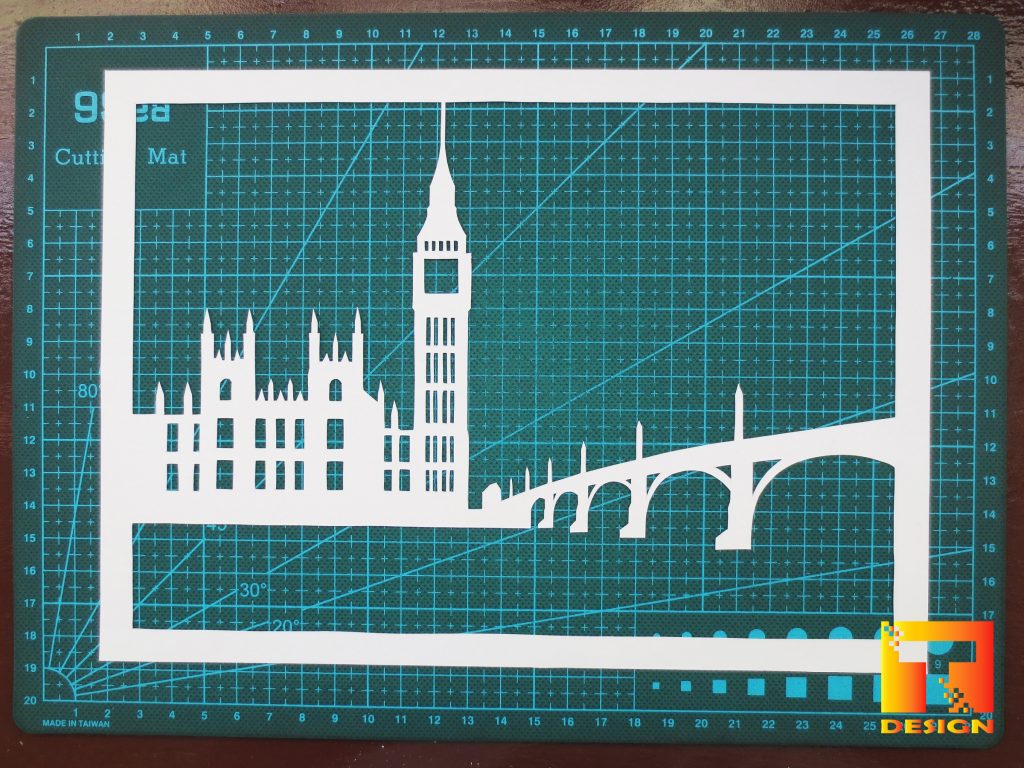
Step 1: Cut the paper.
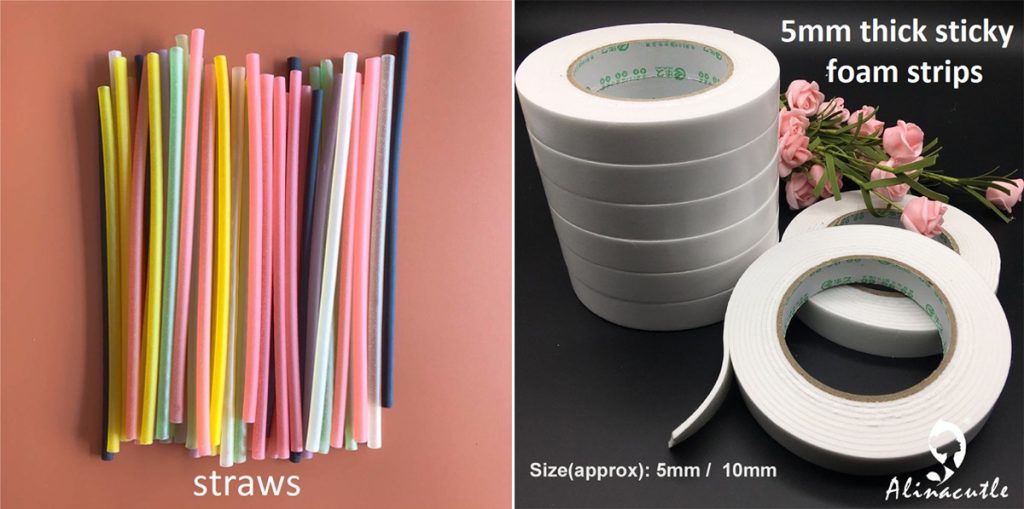
Step 2: Cut the spacers 5 millimeters thick. (using a “foam board” or similar material of 5 millimeters thickness – e.g. straws, 5mm thick sticky foam strips, etc.)
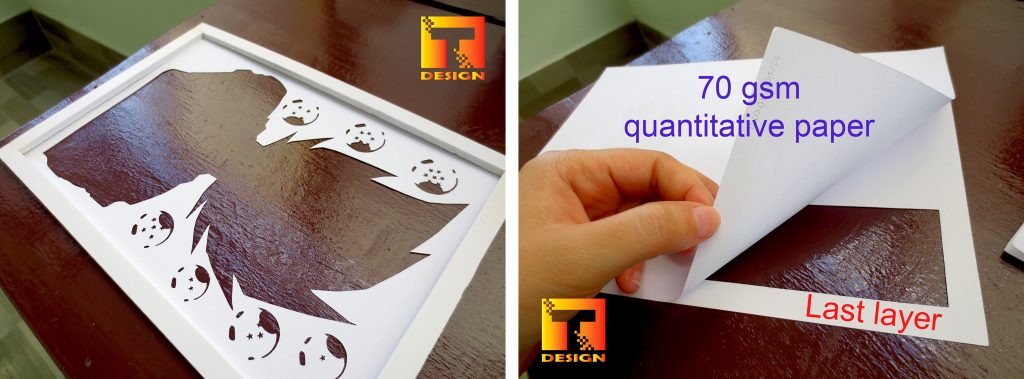
Step 3: Stick the spacers on the back of each layer.
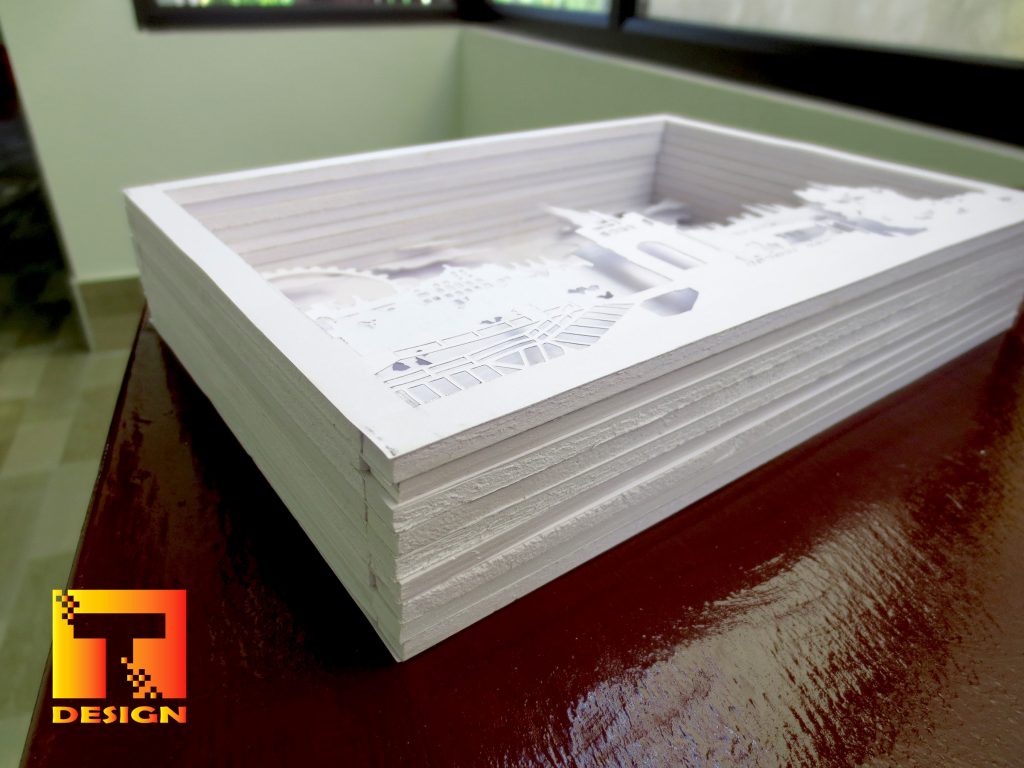
Sort order of layers: Artboard 1 (first page) is placed at the first and front position of the light box. The last artboard (last page) is at the back.
– Take the first layer of paper (artboard 1). Identify the front and back of the paper layer.
Tip is to compare with PNG files or product photos: the front of the layer looks like PNG files and product photos, the reverse is the back side.
– Stick the spacers on the back of each layer. Thickness of spacer is 5mm, and 5mm is the distance between the layers of paper.
– Do the same with the remaining layers of paper.
Note: Particularly the last layer just pasted a thin sheet of paper (70gsm paper). This thin layer of paper will hide the LEDs, and at the same time help the light to be more evenly distributed instead of focusing on one point.
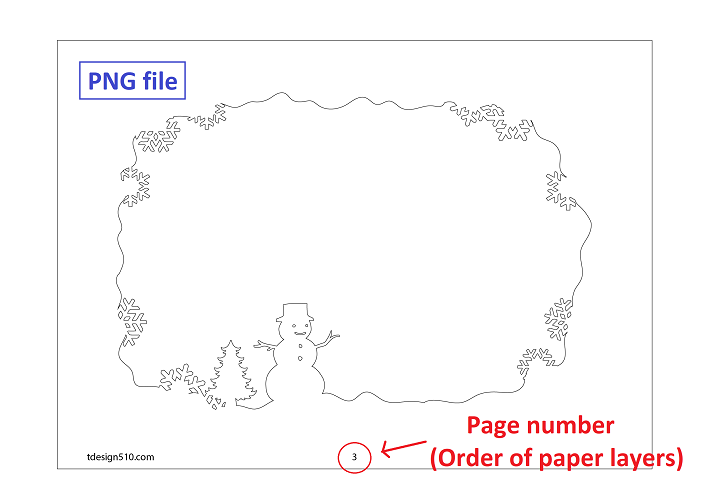
The file name (artboard 1 to 8) is also the order of the paper layers. And this order is also displayed in PNG or PDF files.
Step 4: Glue all layers together.
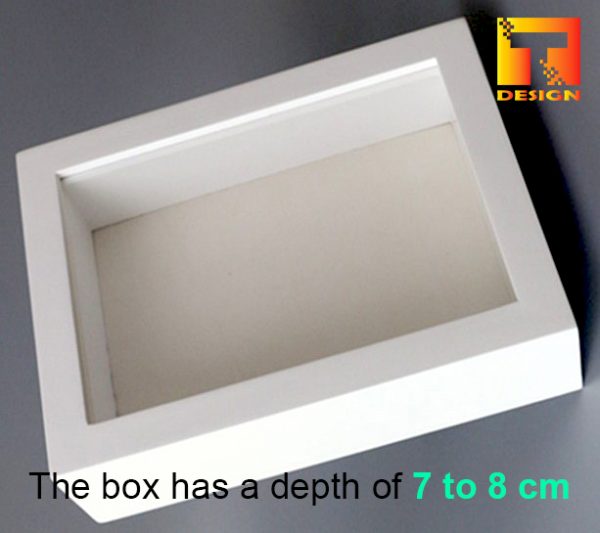
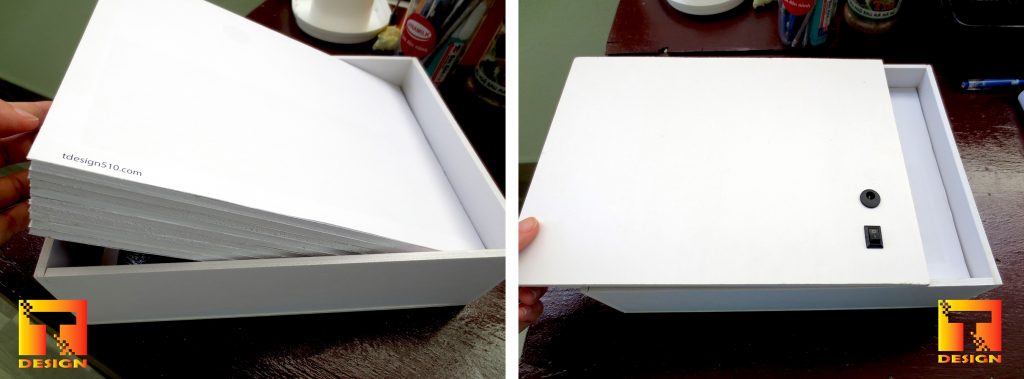
- Step 5: Make a box frame with a depth of 7 to 8 centimeters. (using wood or “foam board”)
– The depth of 7cm (70mm) is enough for templates with 11 layers. (1cm = 10mm)
– If the pattern has fewer layers, you can subtract 5mm from each layer to get the required box depth. For example, if the template has 7 layers, the box frame only needs a depth of 5cm. [ 70mm – (11-7)*5mm = 50mm = 5cm ]
– In case the box frame still does not have the required depth, you can use thinner spacers (3mm instead of 5mm).
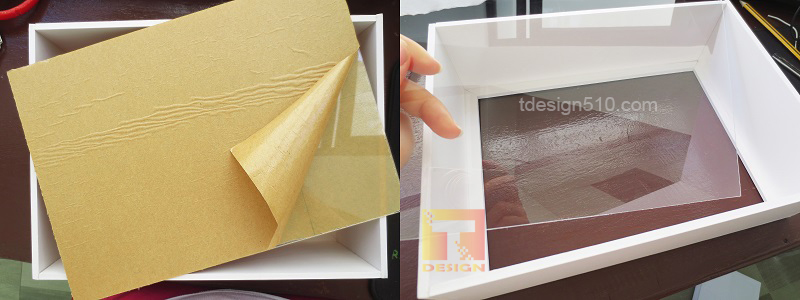
Put the clear acrylic sheet (or glass) into the box frame. (It is used to prevent dust from flying inside the box).
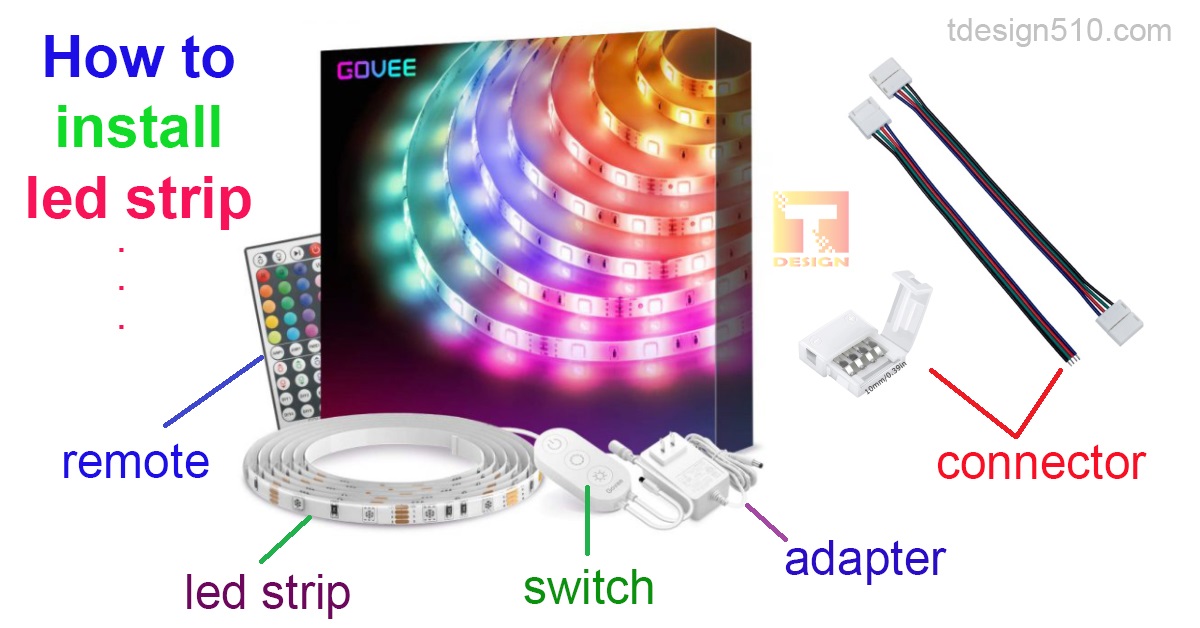
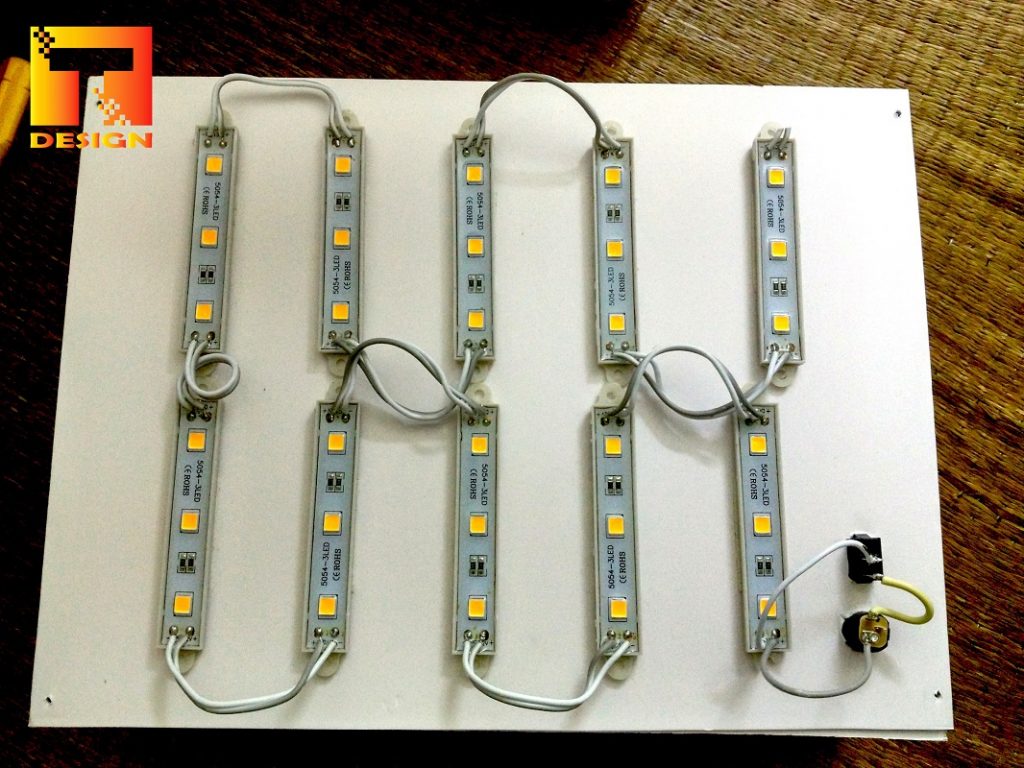
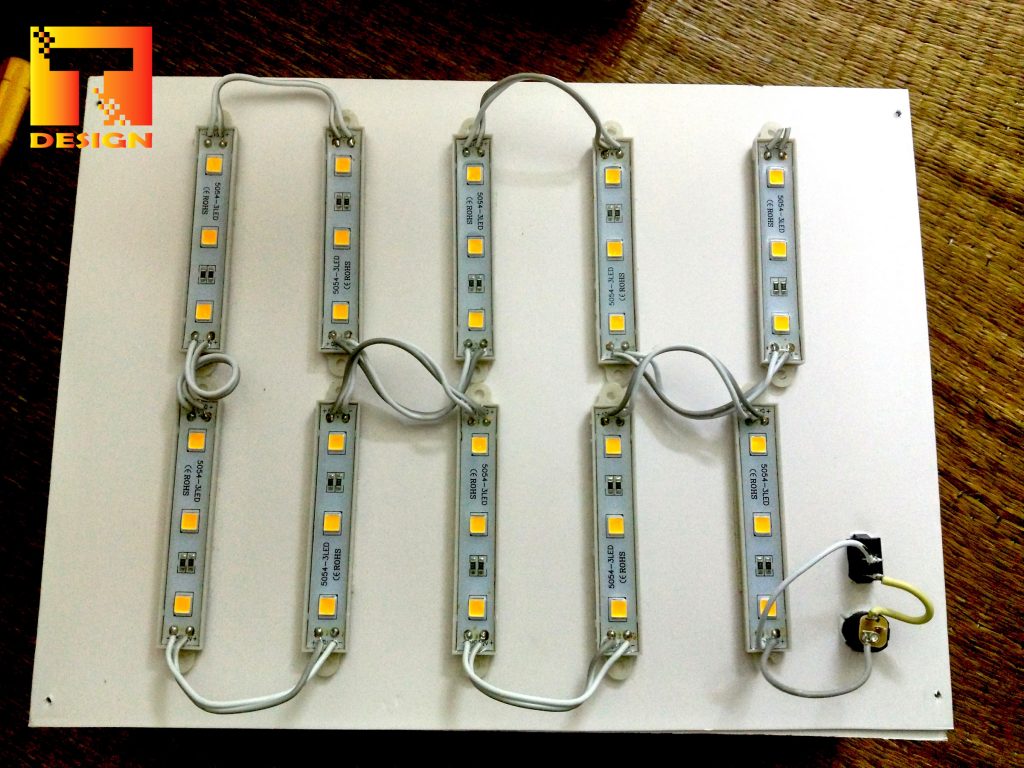
Step 6: Install the Led light on the back of the box. (can use 5-volt or 12-volt LEDs, monochrome or multicolor)
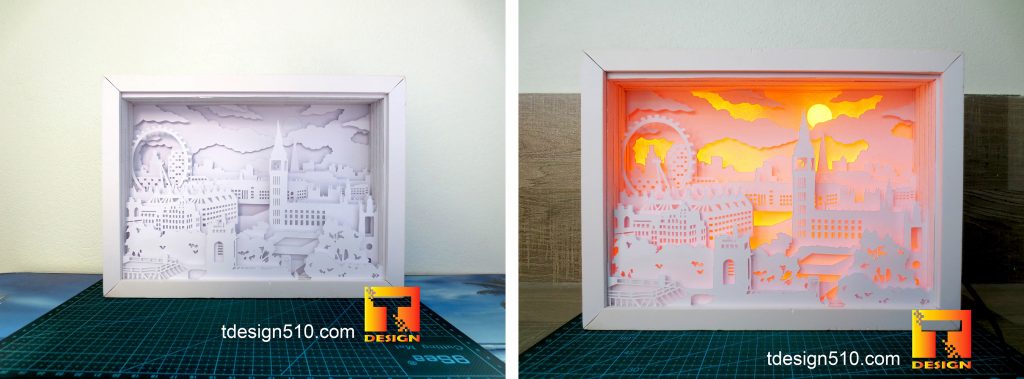
Step 7: Put the picture into the box and close the lid.
Step 8: Turn on the light!

——————-
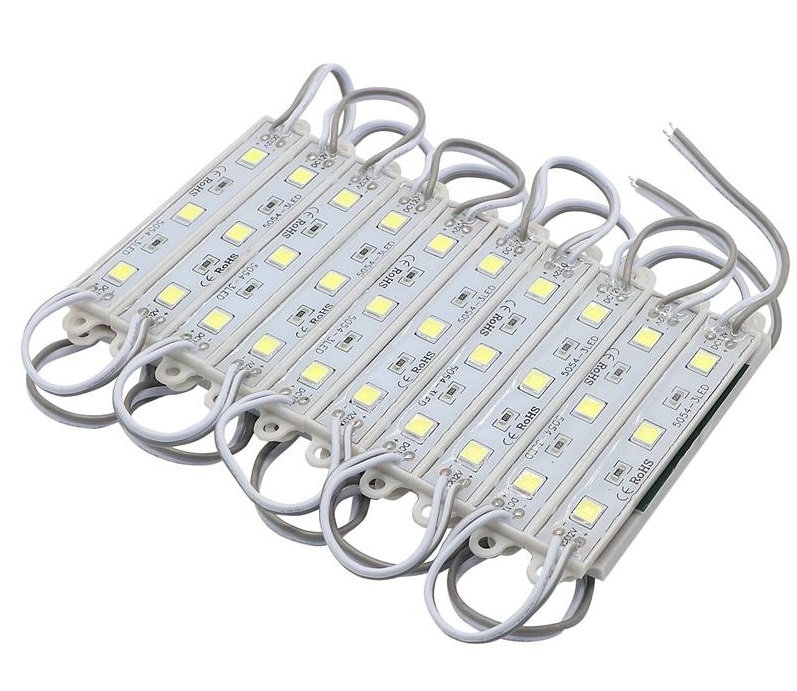
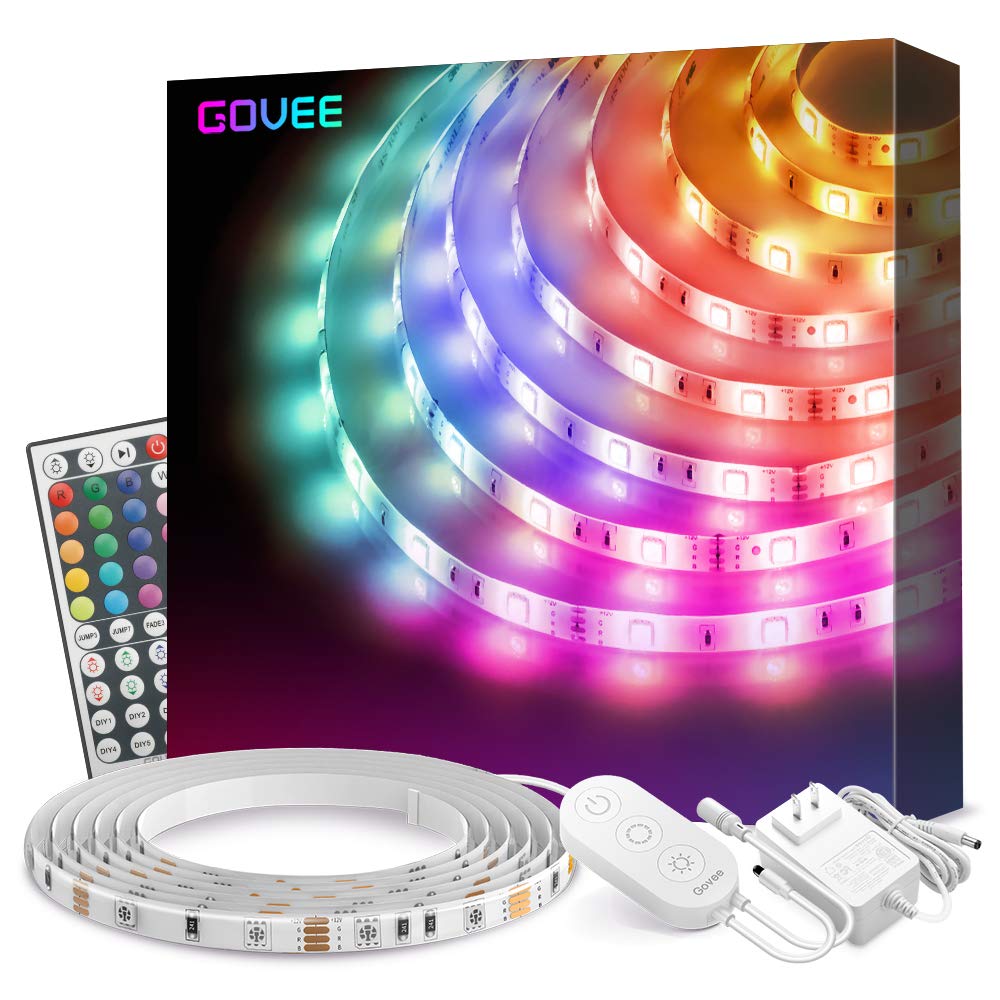
Suggest suitable led lights
LED lightings 3 modules
Or led strip lights
Or led fairy light
This type of light is a bit weak, so fix it by increasing the number of leds.
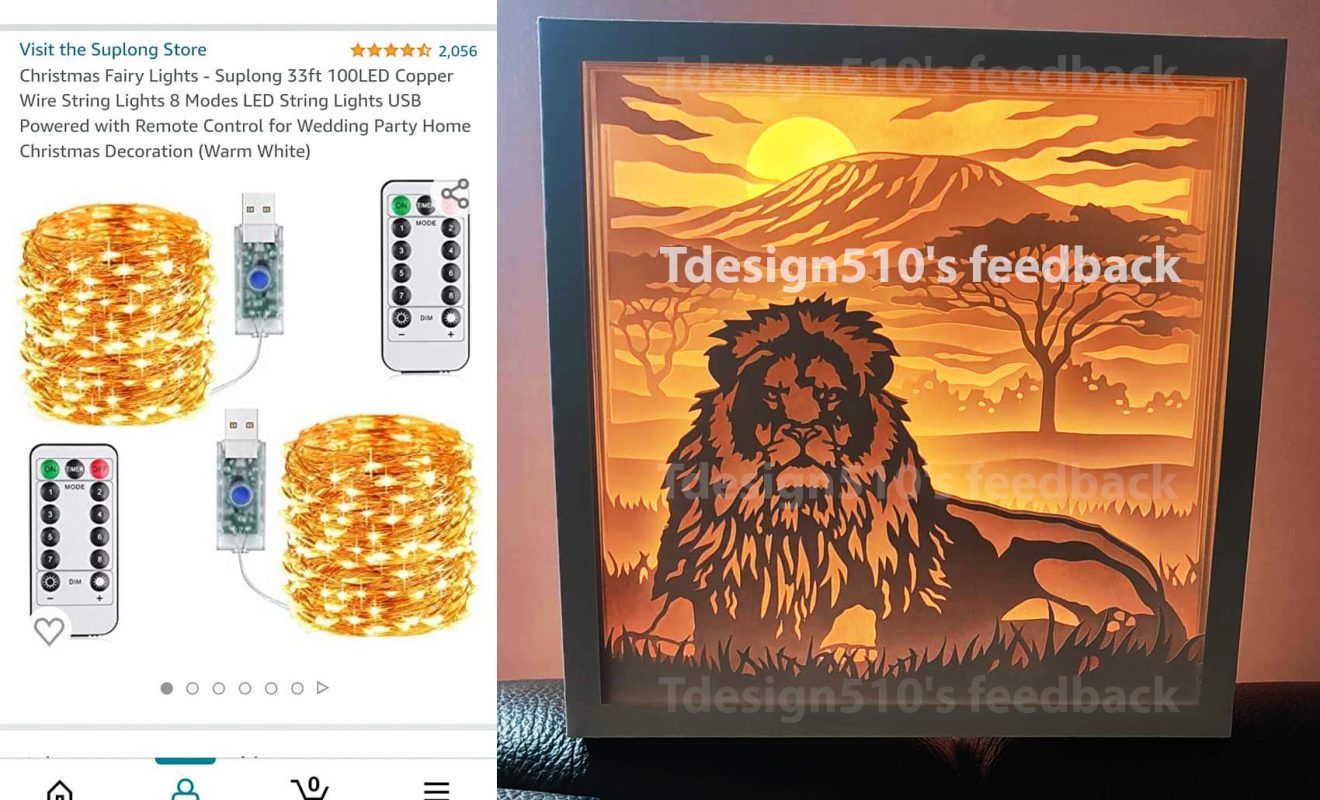
Below is the feedback of one of our customers when they use the “Fairy Light 100LED 8 modes” led.
———–
Glass or plastic (clear acrylic sheet)
You can see its position in the structural image of a light box.
Its effect is to prevent dust from flying into the light box. So you can still make paper light box even if you don’t have a sheet of glass or plastic (clear acrylic sheet).

Tag: tutorials, instructions
Thank you for reading!
Tdesign